Editing with VS Code and Pandoc
Description
The following method will assist in getting tools ready for editing documents, in just about any format, and make trackable changes within those document(s). In this page I make use of Markdown since it’s become a standard for many technical writers today. I will also use a source management system to check in my edited files. For this page I use Microsoft’s Azure DevOps for as a repository storage, you may use other services such as GitHub, GitLab, Bitbucket, or other but the tools below are still recommended.
 version control
(BTW, full name is Global information Tracker)
version control
(BTW, full name is Global information Tracker)- Pandoc a universal document converter
 Visual Studio Code
(a.k.a. VS Code) for editing the documents
Visual Studio Code
(a.k.a. VS Code) for editing the documents
📓 Within this document I created icons () on the right side of text areas that will allow you to place the text into your workstation’s clipboard. Please feel free to use them.
Tools
Get the Tools
Download and install each of these 3 tools onto your workstation.
Configure the Tools
After you’ve completed the installation of the 3 applications above, please proceed to configure and/or confirm each app for the rest of the tutorial.
-
GIT
The GIT client on your workstation requires global parameters to be set. These parameters are used for tracking work you’ve contributed when posting changes to a repository (a.k.a. repo). Without these parameters set, you will experience errors when publishing the changes.
- Verify that you have installed GIT on your workstation by completing
the following steps:
-
Press and hold both the
Windows Key(🪟)along withRon your keyboard.📓 This will open a
Rundialog box requesting you to type a command into a text box. -
Type
cmdin the text box and press the Enter key.📓 This will open a new command window with a prompt.
-
Type
git --versionat the prompt and press the Enter key.📓 You should get a response showing the GIT version installed on your workstation. If you did not get a version, or you received an error message, please install/re-install the GIT application and complete the above steps.
-
Keep the command window open for the next task.
-
-
Copy and paste the commands shown below and execute them within a command window (from previous task):
-
Set Username
git config --global user.name "[Your Name]"❗Replace
[Your Name]and press the Enter key -
Set User Email Address
git config --global user.email "[Your Email]"❗Replace
[Your Email]and press the Enter key
-
- Verify that you have installed GIT on your workstation by completing
the following steps:
-
Pandoc
There really aren’t any configuration settings for Pandoc. Just verify that the tool has been installed by executing the following steps. If you’ve kept the command window up from the GIT configuration, then you can use the same command window and skip to step #3 below.
-
Press and hold both the
Windows Key(🪟)along withRon your keyboard.📓 This will open a
Rundialog box requesting you to type a command into a text box. -
Type
cmdin the text box and press theEnterkey.📓 This will open a new command window with a prompt.
-
Type
pandoc --versionat the prompt and press theEnterkey.📓 You should get a response showing the version of Pandoc installed on your workstation. If you did not get a version, or you received an error message, please install/re-install Pandoc and complete the above steps.
-
You may now close the command window.
-
-
VS Code
VS Code does contain basic Markdown editing capabilities without the following extension pack, but these additional features will assist in many advanced markdown editing such as support of formulas, images, checkboxes, tables, emojis, and more.
-
Open a browser window by clicking on the following button.
-
On the new web browser page, click the
Installbutton.📓 VS Code should open up with the same web page displayed in a tab of the main window.
-
Click the
Installbutton again on the page that is now displayed in VS Code.📓 This should now show that it’s installing the additional Markdown editing features. In a couple of minutes you can open the Extension Viewer to see the new features. Within the extensions view you may click each feature and read more details about each which may also provide how best to use each.
-
Install the following VS Code features by clicking the buttons below and follow the methods as in the previous steps.
-
Create a New Repo and Populate
-
Contact a DevOps Project Administrator to create a repository that is to be used for storing your work. Also request that they send you back the full URL of the repository, not the Project URL.
The admin should respond back with the URL that looks similar tohttps:/dev.azure.com/.../_git/[a repo name].
(The...represents the name of the organization and project, then/_git/followed by the name of the repo represented as[a repo name]above).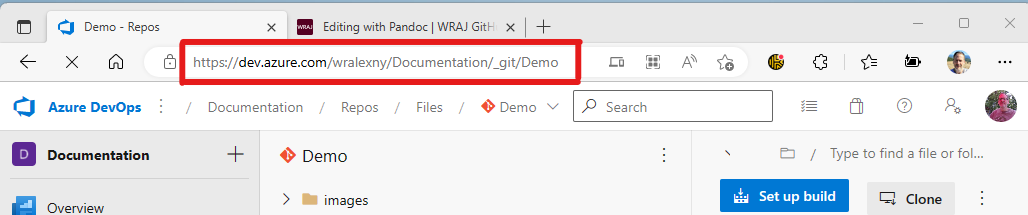
(Example of how the URL should look)
-
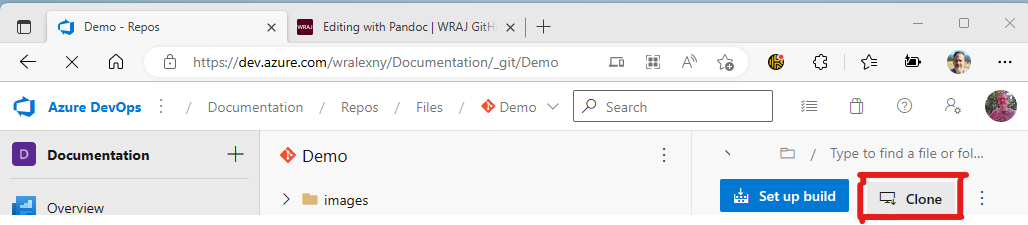
Open the link to the repository (see above) in your web browser. (You may need to sign in with your organization account)
-
Click on the Clone button at the top right area
-
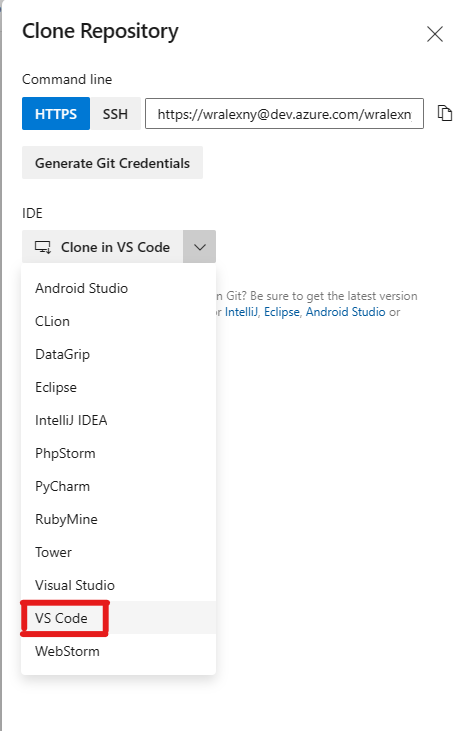
The Clone Repository blade opens. Under the IDE (integrated development environment) section is a list of applications that you can use to clone the repo locally. One of those options is VS Code. Click on that title to begin the process of cloning to your local workstation.
-
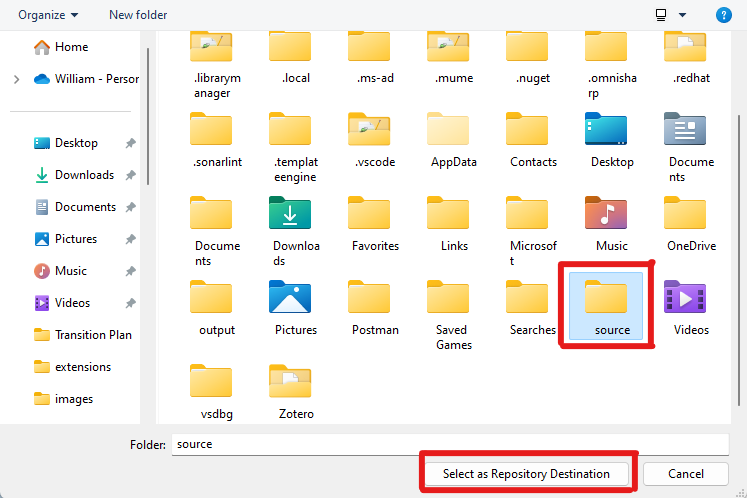
A folder dialog box will open on your workstation. Navigate to a local folder on your workstation that you would prefer storing the repo locally. You don’t have to create a folder with the Repo name, this will create a subdirectory under the folder you choose with the name of the repo.
-
VS Code will open automatically, and you will be to provide credentials. Sign in with your account so that the repository is cloned locally to your workstation.
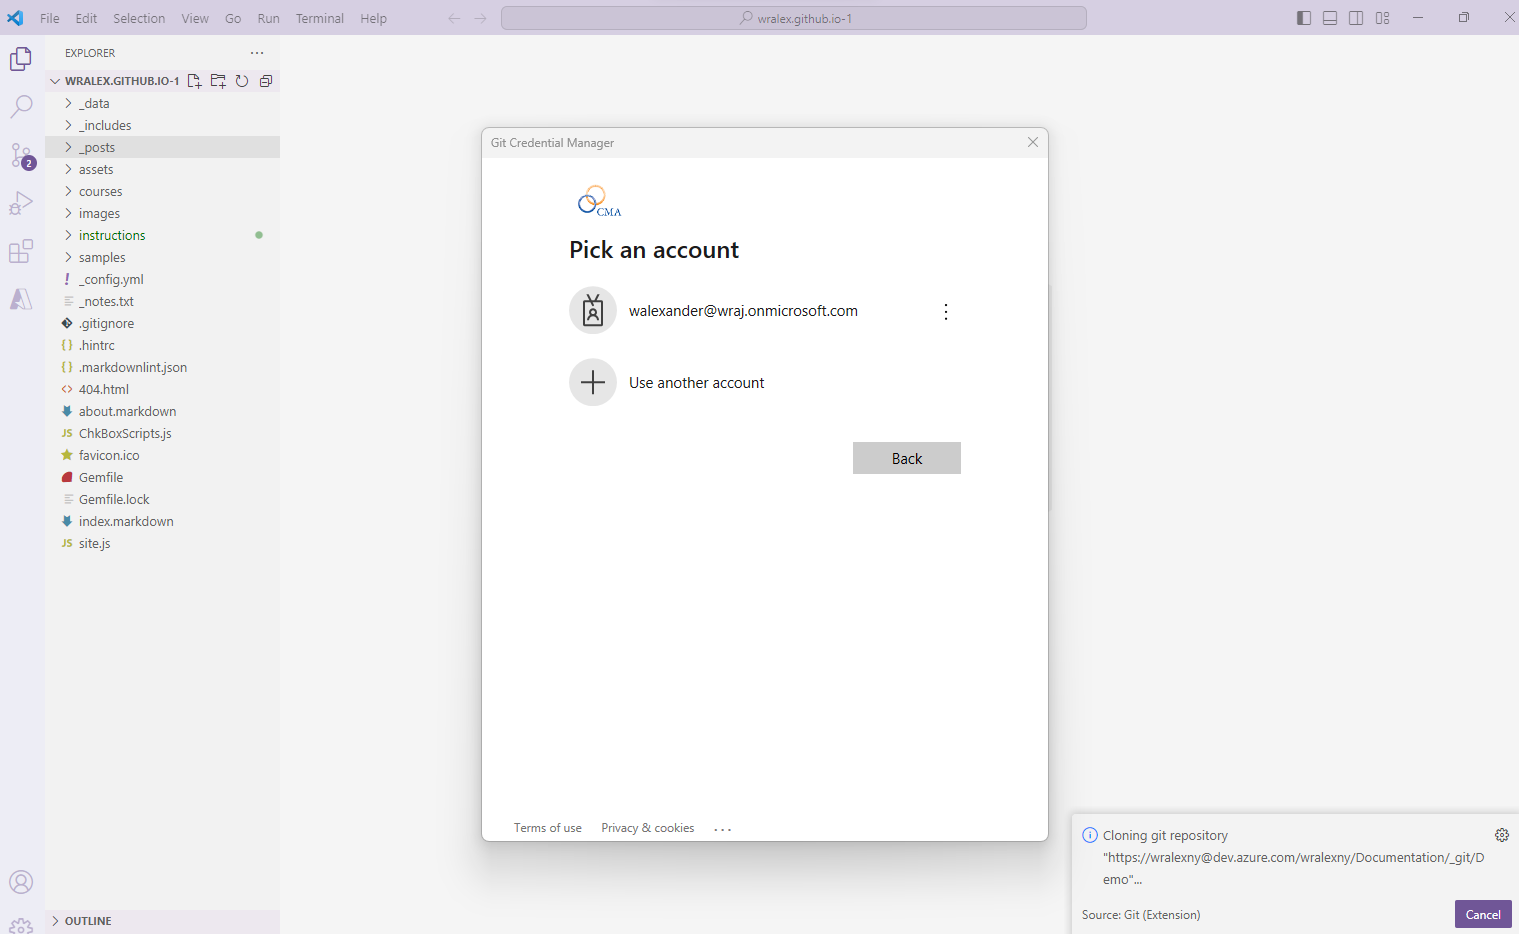
In addition, you may also be asked to trust the author’s of the file in the folder. You can click the checkbox to Trust the authors… and then click the Yes, I trust the authors button to start working on the project.

-
Once the project opens up in VS Code move the mouse over the Folder+ Icon (to the right of the name of the Repo) and click the mouse button to create a folder named
original(or whatever you prefer to use as a name, but for this tutorial we will be usingoriginal).
This will be where the original document is to be stored in the project and placed into the repo when committed and published later.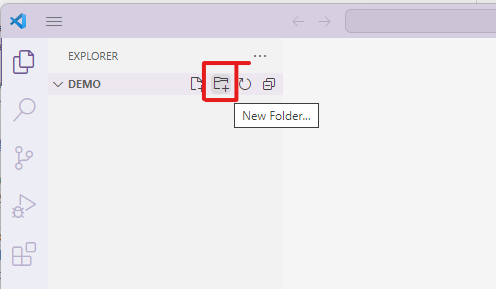
-
For this tutorial download a sample Word Document file by clicking the following link:
Sample Word Document
➡️📓 NOTE: Please keep the location of where you place the file on your workstation. It is needed for the next step.
-
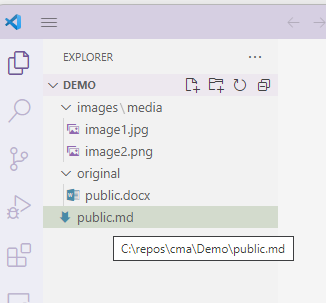
Open File Explorer Window to where the document was downloaded, then click and hold down the mouse button and drag the file into the
originalfolder within VS Code.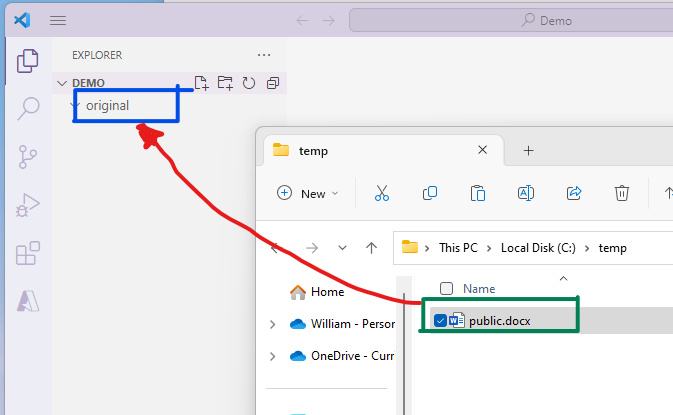
📓 Verify that the file is under the folder by collapsing the
originalfolder and seeing if the file isn’t displayed. If it is still visible then the file is placed in the root of the project and will need to move. If it does require to be moved, you can also drag the file within the VS Code file tree view. It will ask you to confirm it to be moved, please do so. -
While in VS Code window press and hold
Ctrland`(the key to the left of the 1 key) for the Terminal section to open up at the bottom.📓You can also open this up by using the app’s menu navigation View ➡️ Terminal
-
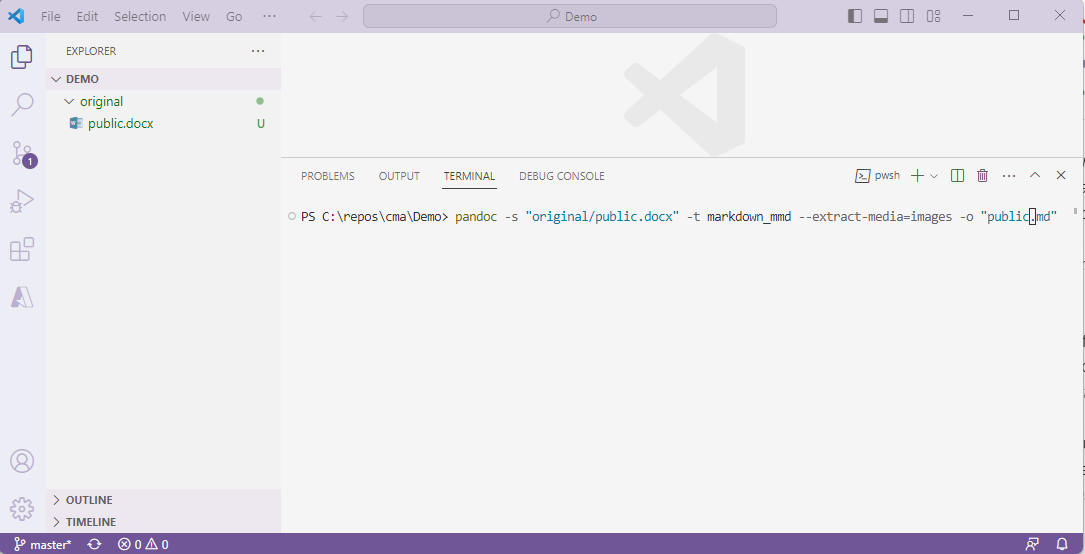
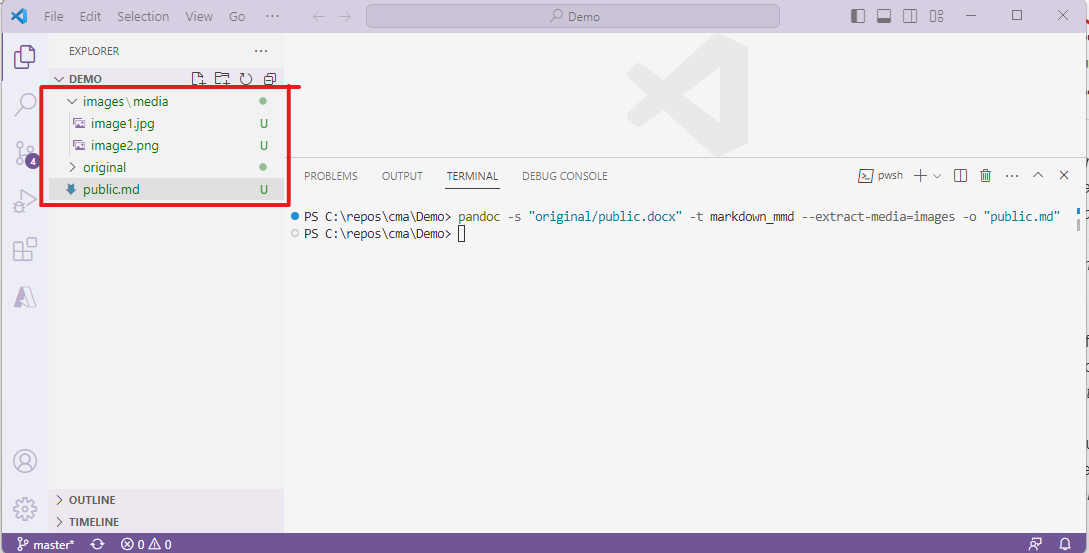
Within the Terminal windows make sure you’re at the root directory of the project and type the following command and press the Enter key.
(The sample document name is used in the command line but if you have an alternate document name please replace public in both locations within the command).pandoc -s "original/public.docx" -t markdown_mmd --extract-media=images -o "public.md"📓 If you are in a subdirectory, like
...\orginal, just typecd ..and press the Enter key to go up a directory level and type the above command.📓 This will generate the new Markdown file ([Word Filename].md) along with any embedded images that it could pull out of the document and place them into a new directory called images.
-
Go to the Source Control icon on the left side and in the text box, above the ✔️ Commit button, enter a statement such as
Initial with Convertedand then click on the ✔️ Commit button to commit the initial files (this doesn’t push it to the repo yet, that’s the next step)😃.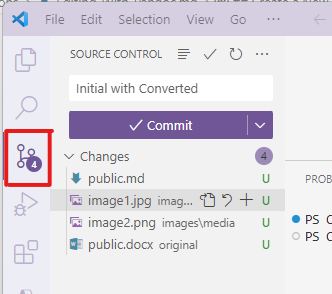
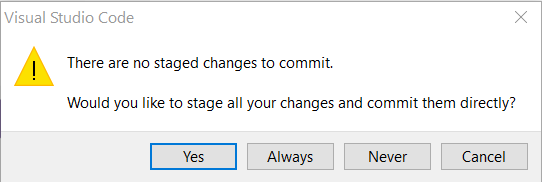
You may receive a request stage changes to commit. To make it simpler for this and future requests I recommend clicking the Always button to not have this message appear in future commits. Otherwise, you can click the Yes button for the changes to be staged and then committed.
-
The ✔️ Commit should have changed to a Sync Changes 1 ⬆️ button. Click the Sync Changes button and this will publish your changes to the repository.
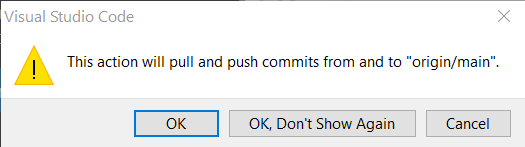
You may receive the following dialog box after clicking the Sync button. To remove future dialog boxes from coming up in the future you may want to click the OK, Don’t Show Again button, otherwise you can click the OK button, understanding that this message will pop up at later times.
You may also have the following appear where VS Code can try and keep in sync to the remote repository where it will periodically will go out and do a fetch call to see if have been changes since the last time you’ve synchronized your local cloned repo to the remote repo. It might help to click the Yes button to keep it up to date.

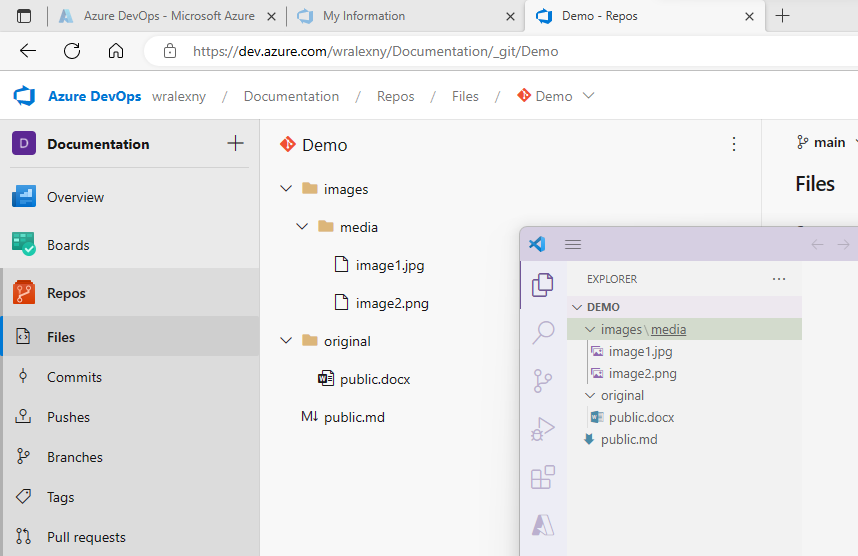
📓 Once the publishing of the changes are complete you may go back to DevOps and see all the files you’ve placed in the project are now also stored in the repository including the original document, markdown file, and any images.
That is it for initiating the conversion of the original document into a Markdown document and posting it into a repository.
Modifying a Document
Markdown
I won’t go into too much detail about what Markdown files are. There are many online sites that can provide you with more of an explanation, but it is basically a stripped down HTML text file. There are also “flavors” of Markdown providing the output of those text files with minor differences. They also have additional extensions that support these flavors to enhance the output such as support for emojis, grid matrix tables, element attributes, etc.
If you would like to get more detail about Markdown here are a couple of links you can find more information.
- Markdown Guide (In depth explanation and covers a lot of material relating to Markdown… Highly recommend this site 💯%)
- Daring Fireball: Markdown (this is John Gruber, the creator of Markdown, with an introduction of what Markdown is)
- Markdown Tutorial
Introduction of Editing Tools
VS Code is a Source Code “Editor” but not just for Markdown files. It’s an Open Source and free to use application and supports many code formats (i.e. C#, Java, C++, HTML, Markdown, etc.) so it’s versatile and powerful and has many uses. However, this means that the application is not going to be an out-of-box document editing tool that has all the “bells and whistles” that document editing applications such as Word or Google Docs where text styles, drag-and-drop of items, image tools, and other integrated services are built in.
With that explanation I will try and guide you to how VS Code will assist in your development of Markdown files.
-
Open the “.md” file you have converted from the previous tasks.
-
Near the top right area of VS Code are a series of icons, click the first icon, it’s to Preview the opened file.
By clicking the icon you will have split sections (known as panes) of what is currently being edited. The left pane is the actual file, then there’s a mapping section in the middle, then a vertical scroll bar that controls the view of the Markdown Code file and finally the “Preview” pane to the right that also has a vertical scroll bar.
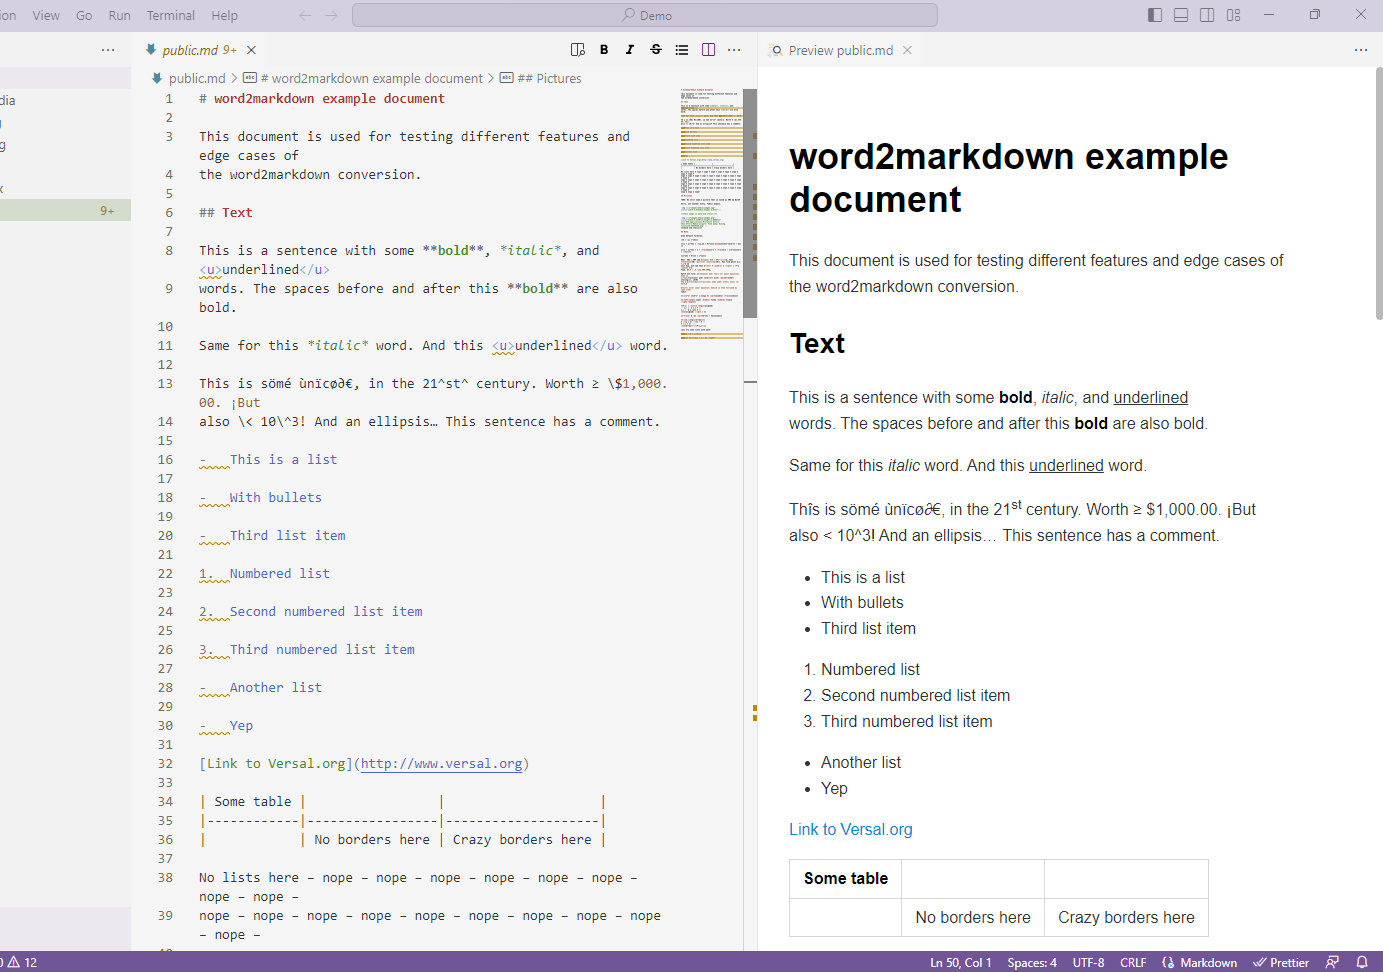
📓 Please also note that the Icons have also moved to the left pane. This is because they are used for editing the Markdown text file, not the Preview pane.
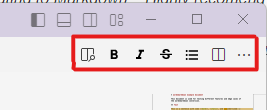
The second, third, fourth, and fifth icons are:
- Bold
- Italic
Strike-through- and Bullet List
Each of these icons will work for an area of text you’ve selected in the editing pane.
The last 2 icons are standard with VS Code editing that will Split the editing pane or Show More actions…. You can move your mouse pointer over each icon, and it will pop up with what they represent.
-
Scroll down the left pane (edit section) and view the contents.
Note how there are underlined areas under various text the editor detects something not quite right with the format. Move your mouse pointer to one of these text spots, and it will give you detail indicating what it detects. These are called Linting (the process of using static code analysis tool identify stylistic errors in code) “rules”. This doesn’t indicate a true error, just a formatting rule that has become a standard. During the conversion of the document using Pandoc the converter doesn’t always use the same rules that the Markdown Lint is using. This service can be useful if you would like to keep a standard.
In addition to the text indicating that there’s a rule issue you should also see that it’s indicated on the mapping area (the region between the code and the vertical scroll bar on the left pane). This mapping section is useful to show regions of the document at a quick glance. You can also click your mouse button in this region to move to that spot of the document in case it’s a very long document. BTW, the vertical scroll bar also moves you through the document quickly, and it also has colored indicators that show you where you are and if it also detects any issues.
-
Scroll to line 51 (the numbers are to the left of the editing text) and change line 51 & 52 with -
Before

After

📓 With Pandoc when you convert from Markdown to other formats, Images that use the HTML Element don’t convert back. Try to change any images that use the
<img...>element to the format shown above. -
Scroll to the very top (line 1) of the document and insert the following text (Replace [Your Name] with your real name):
---
title: 'Sample Markdown File to be converted to Word'
author:
  - [Your Name]
---
This is what they call Front Matter in Markdown. Not all Markdown Converters use this, but it’s useful for Pandoc and DevOps to display Metadata of the document. This is commonly in a YAML format (No real need to understand YAML right now) and the 2 Meta tags that are being put into this example.
They are:- Title - The Markdown Document’s Title
- Author - A list of Authors of the document.
There can be 1 or more names by just placing a carriage return after each, then 2 spaces, a hyphen, then space and a Name.
-
Go through the rest of the document and make any changes or additions to it and when finished commit and publish the changes to the repository as you completed in the conversion task above.
-
Go to the Source Control icon on the left side and in the text box, above the ✔️ Commit button, enter a statement such as
Updated Markdown documentand then click on the ✔️ Commit button to commit the initial files. -
The ✔️ Commit should have changed to a Sync Changes 1 ⬆️ button, click the button to complete your changes to the repository.
-
That concludes the document modification task of this tutorial. Please take some time to get familiar with VS Code and/or Markdown. Also visit some recommended links mentioned above to get familiar with the Markdown language. After a while you may see why Markdown has become a great way to create and publish documents.
Create Publications
Now that you have become familiar with Markdown and you are ready to create a Document, or Web page, or PDF, or all the above, then we can proceed with the next couple of steps to generate those results. In this section we will use Pandoc which is a free software product available and has the capability of converting documents to and from various formats. We will be using the Markdown file in VS Code from the tasks above and will generate a Word Document and also as a Web Page.
- Open VS Code with the same project that you were working on from the previous exercise.
-
Download the following YAML file:
Public Default Writer File
➡️📓 NOTE: Please keep the location of where you place the file on your workstation. It is needed for the next step.
-
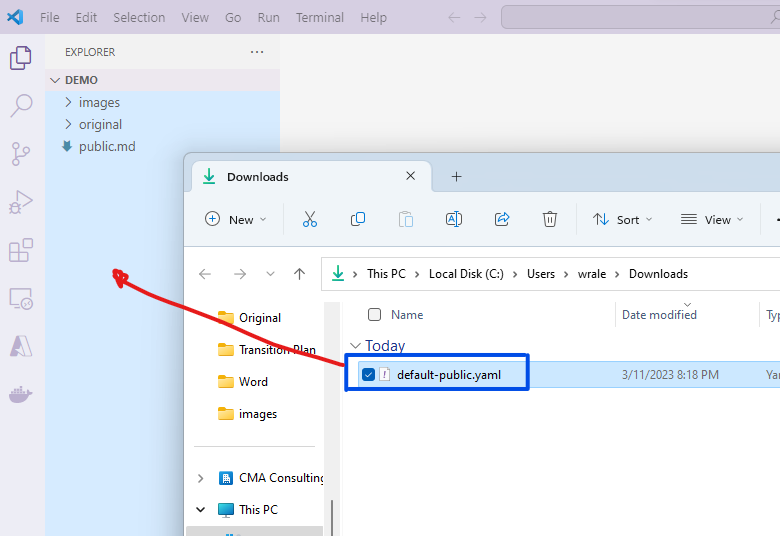
Click and drag the default-public.yaml from the downloaded location into the root of the VS Code Project just like you did with the public.docx file in the previous task, except this file should be placed in the root of the project, not a sub-folder (it may help if you collapse all the directories in the tree view in VS Code).
-
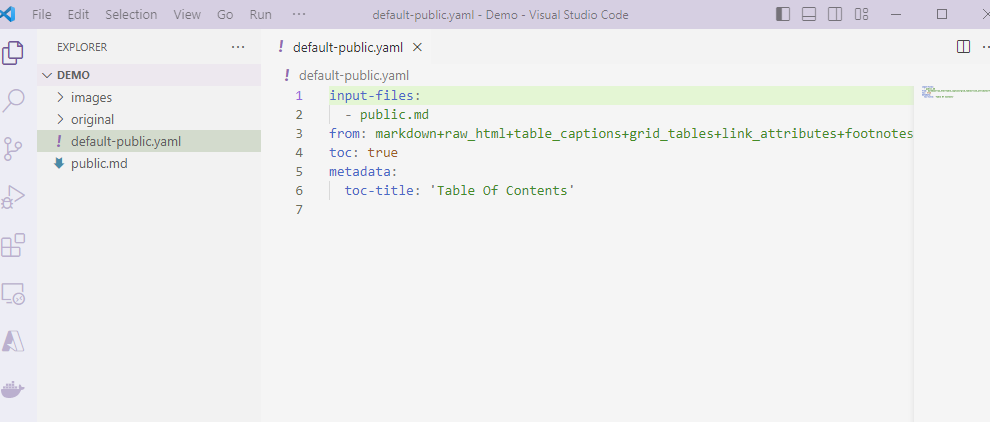
If not already open, click on the new YAML file so that you can view the contents.
The content file contains parameters that will be used during the Pandoc conversion for generating both a Word Document and a Web Page.
File contents:
input-files: - public.md from: markdown+raw_html+table_captions+grid_tables+link_attributes+footnotes+emoji toc: true metadata: toc-title: 'Table Of Contents'-
Input Files
The first parameter is
input-files. This can be 1 or more Markdown files. If you have more than 1 file it “stitches” the files together into 1 result. It also puts them in order that the files shown in the listing. -
From
The
fromparameter is describing the format of the originating document. This is all in 1 string sent to the writer portion of Pandoc. In this version we will be usingmarkdownwith the following additional extensions (more extensions can be added by looking them up at Pandoc’s User Guide and using the plus sign (+) in front of the new extension):raw_html- allows HTML elements which are not representable in Pandoc’s AST to be parsed as raw HTML. By default, this is disabled for HTML input.table_captions- A caption may optionally be provided with all 4 kinds of tables. A caption is a paragraph beginning with the stringTable:(ortable:or just:), which will be stripped off. It may appear either before or after the table.grid_tables- The cells of grid tables may contain arbitrary block elements (multiple paragraphs, code blocks, lists, etc.).link_attributes- For HTML and EPUB, all known HTML5 attributes exceptwidthandheight(but includingsrcsetandsizes) are passed through as is. Unknown attributes are passed through as custom attributes, with data-prepended. The other writers ignore attributes that are not specifically supported by their output format.-
footnotes- Pandoc’s Markdown allows footnotes, using the following syntax:Here is a footnote reference,[^1] and another.[^longnote] [^1]: Here is the footnote. [^longnote]: Here's one with multiple blocks. Subsequent paragraphs are indented to show that they belong to the previous footnote. { some.code } The whole paragraph can be indented, or just the first line. In this way, multi-paragraph footnotes work like multi-paragraph list items. -
emoji- Parses textual emojis like:smile:(😄) as Unicode emoticons.If you want to find out more information you can view Pandoc’s User Guide relating to Markdown
-
TOC (Table of Contents)
The last section of parameters relates to generating a Table of Contents. This will be placed after the title of the document (and subtitle and/or author if these are in the front-matter of the document) and before the body of the document. In the sample YAML file we are asking that the
toc(table of contents) is included (true) and in the metadata section we are specifying the heading name to use will be Table Of Contents.
-
-
Download the files below.
-
➡️.gitignore⬅️
-
➡️Create-HTML.ps1⬅️
-
➡️Create-Word.ps1⬅️
❗ Please note where these files are placed since they will be used in the next couple of steps
-
-
Move the 3 files into the VS Code project at the root level (just like you did with the
default-public.yamlfile above).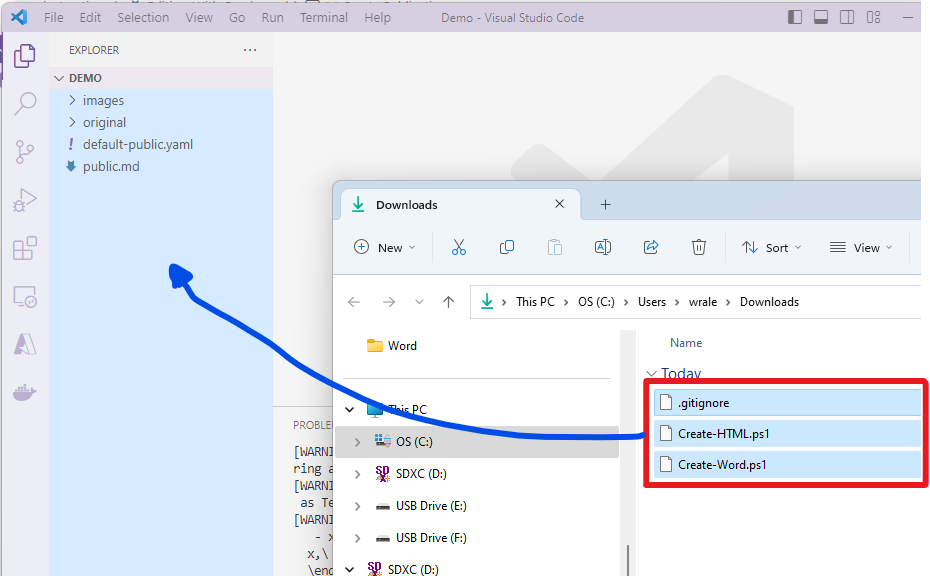
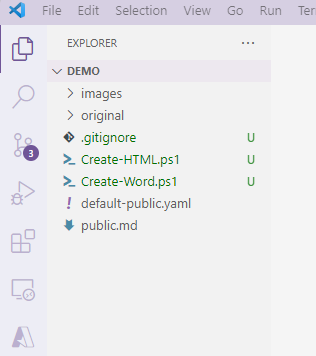
The three files are:
.gitignore- This file is used by the GIT source control that allows for folders and/or files to be ignored for commits and checking into repos. For the purposes of this tutorial there’s an output folder that will be created where the resulting files are generated and since these are based on the actual Markdown file there is no need for the resulting outputs to be kept in source management. Normally those would be stored as an artifact during the building and deployment. For our purposes we will be building the outputs locally and will not need to check the results in.Create-HTML.ps1- This is a PowerShell script file that has multiple commands that will generate subfolders and then execute a command to run the Pandoc process to convert the Markdown text file into a single HTML file with images embedded within that HTML file. We’ll execute and see this output in a couple of steps below.Create-Word.ps1- Just like the PowerShell script file above this will generate a Microsoft Word document with similar results as the HTML document. This should have a close to original output as the original file used to begin with.
-
Open a Terminal window in VS Code by holding down the
Windows(🪟)and`(the key to the left of the 1 key).📓You can also open this up by using the VS Code’s menu navigation View ➡️ Terminal
-
Make sure that the terminal window is using PowerShell as its Terminal window. If you look to the top right section of window it should look like
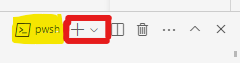
📓 Note the highlighted part of the image shows the current terminal session. If PowerShell (pwsh) isn’t displayed then click on the down arrow right of the
+button and select PowerShell.
Generate Word
Type the following command into the terminal window and then press Enter:
.\Create-Word.ps1
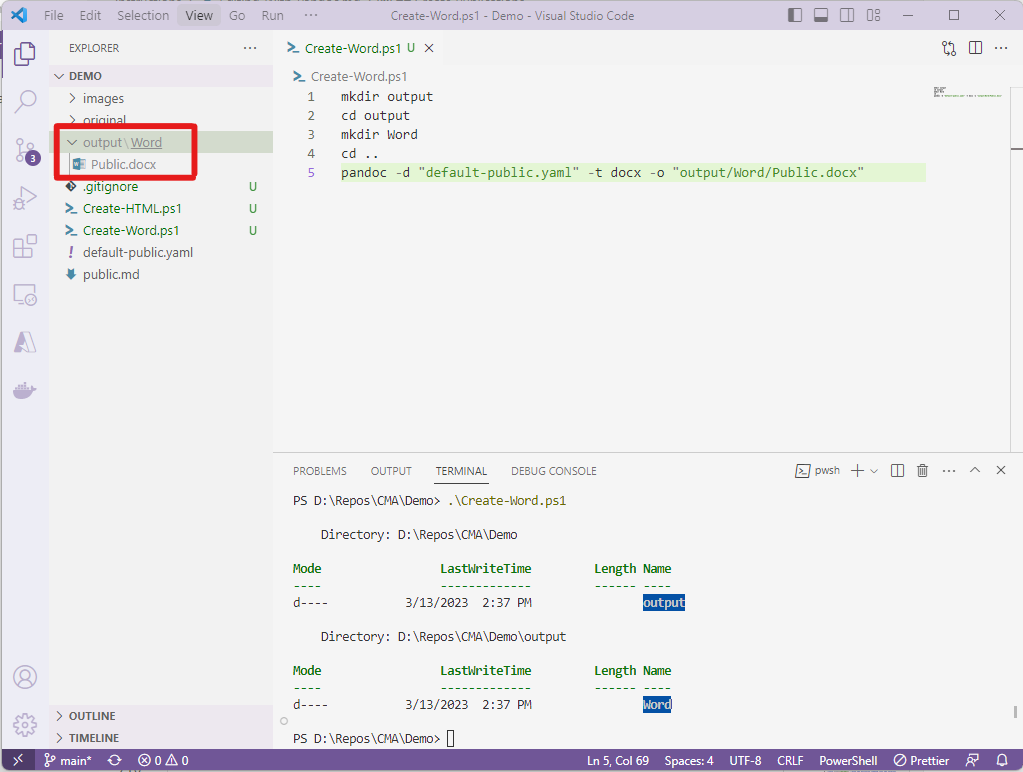
If you open the Create-Word.ps1 file in the editor you can see what is
occurring.
- Creates a subdirectory output at the root of the project
(
mkdir output). - Moves into that subdirectory (
cd output). - Creates another subdirectory Word that will be used to place the
Microsoft Word resultant file within _(
mkdir Word). - Goes back out to the root folder (
cd..). -
Finally, runs a pandoc command line with arguments that will use the default-public.yaml file parameters along with additional parameters specific to generating a Word Document that will be placed in the newly created subdirectories from the commands above
(pandoc -d "default-public.yaml" -t docx -o "output/Word/Public.docx").📓 Notice that the file names are surrounded by double quotes. This is to make sure that the argument
-dand-obeing sent to the pandoc engine as its associated values contained within those quotes. This is especially useful in case the subdirectories or file names contain spaces and without those quotes the values being sent won’t be valid and the command would error.
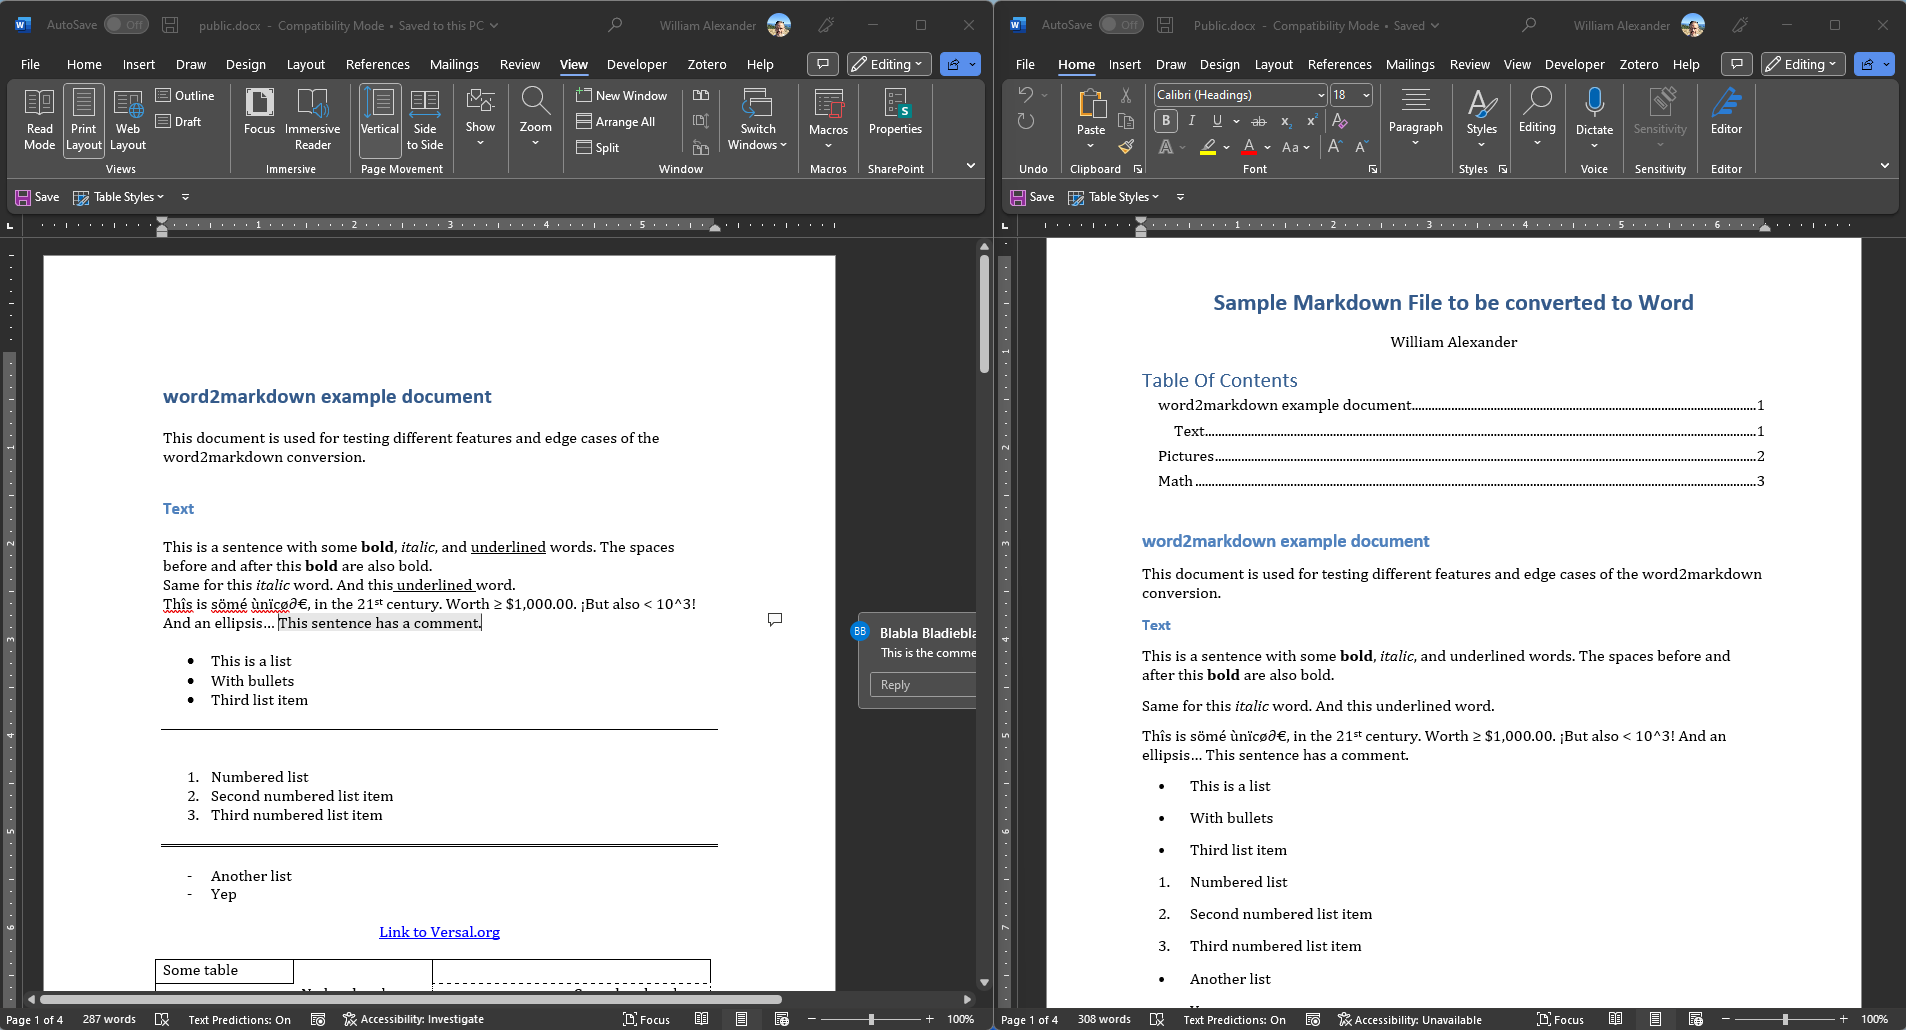
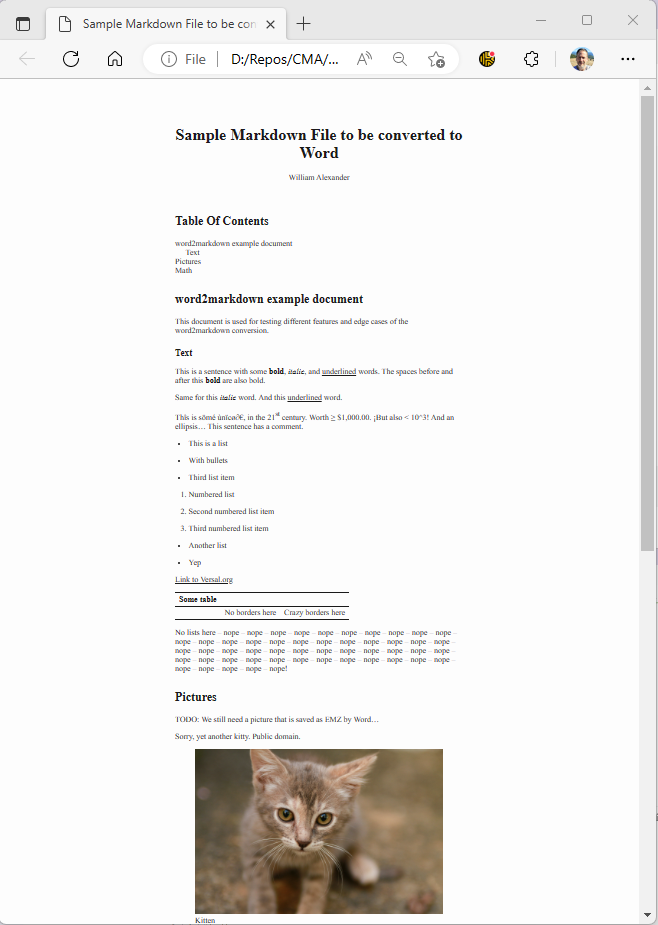
You may open a File Explorer and navigate to the directory where the new document was generated and open it from there. If you compare it to the original document (under the original directory) you should see that the contents are almost identical except that in the new document it used the metadata to creates a Title, Author, and a generated Table Of Contents due to the parameters within the default-public.yaml file.
You can experiment with other options and re-run the same PowerShell Script (just ignore any errors that may come up because those subdirectories were already created).
Generate HTML
You can also generate the HTML version of this document by executing
.\Create-HTML.ps1
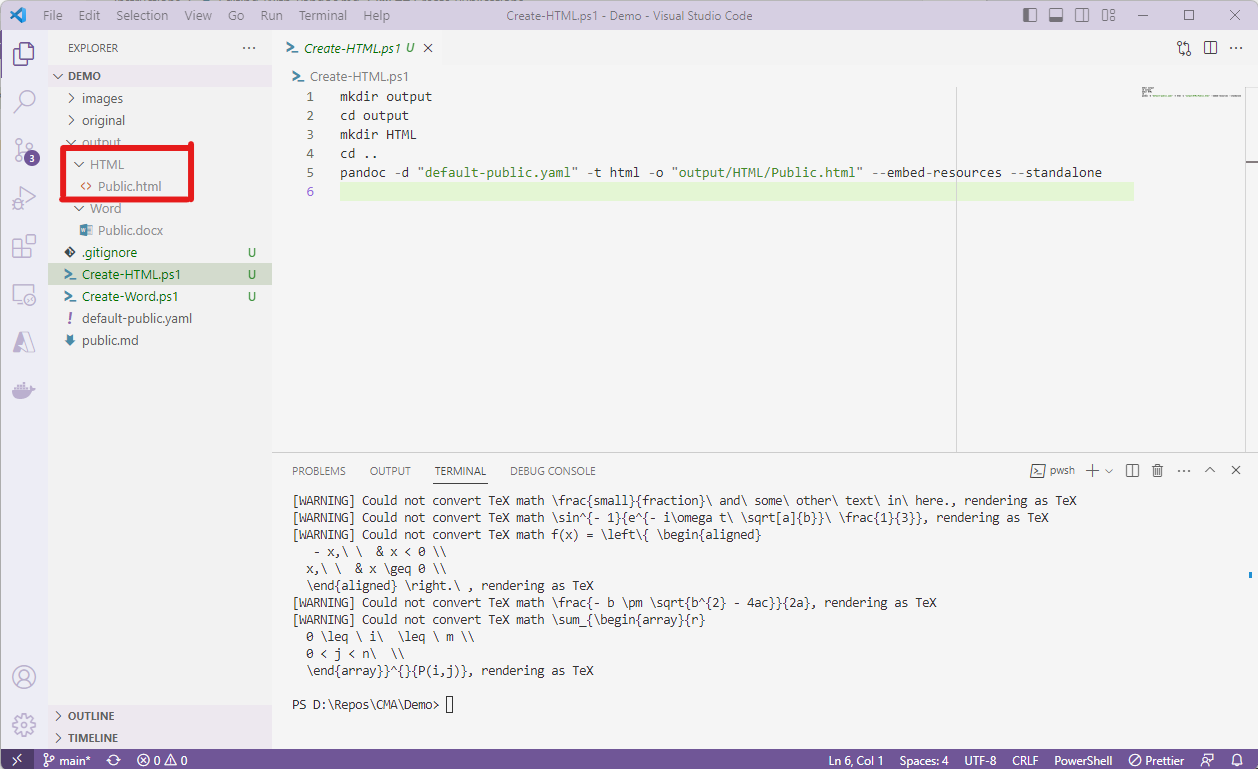
Ignore any warnings or errors that may come up on the screen. Again you can navigate to the folder with your File Explorer and open up the HTML document to see that the contents are now in an HTML format.
You may now commit and publish the project back to your repository and view the files within the repo to confirm that the main contents have been checked in.
This should conclude the section to create the publication. You may edit and work with these files to get a better understanding of the conversion efforts.
Thank You for visiting this tutorial and I hope you have success in editing in the future.